Galentine's Fun Chocolate Layer Cake
Highlighted under: Home-Style Dessert Bakes
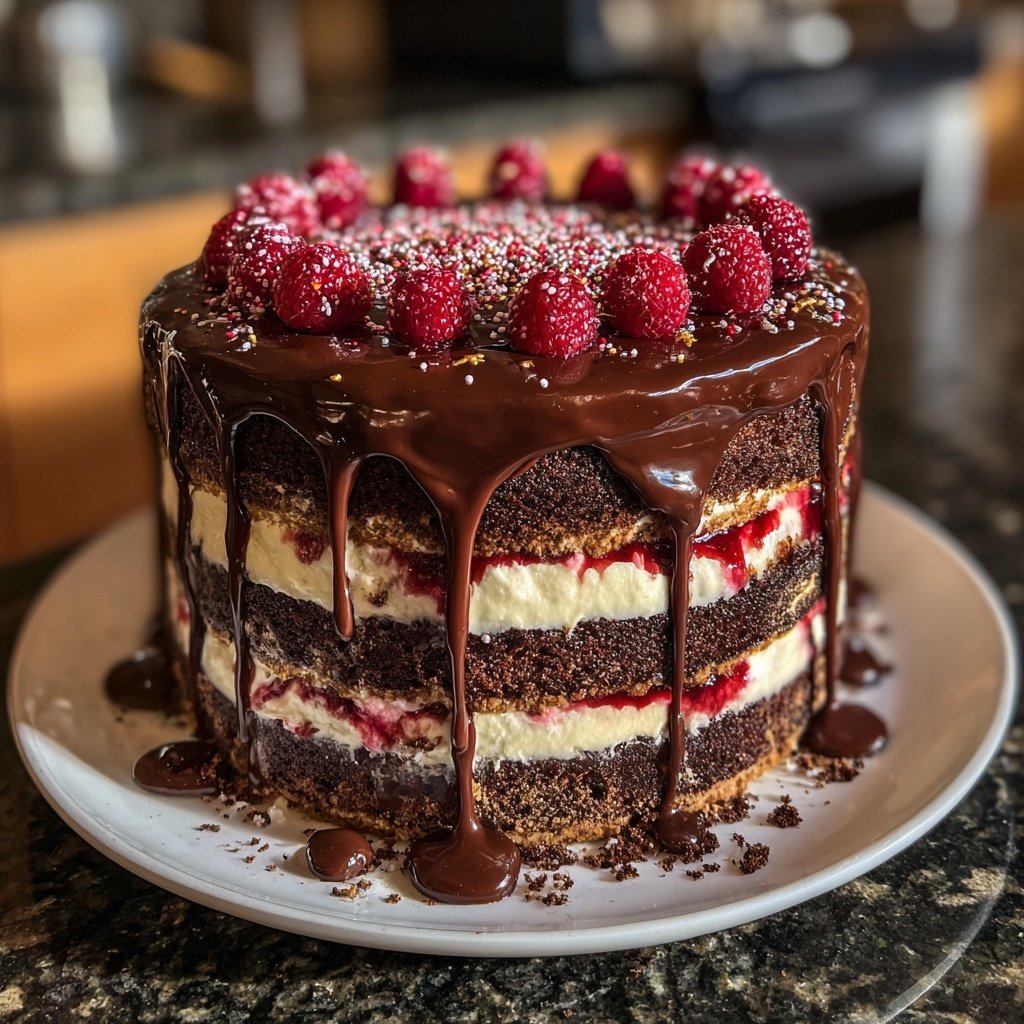
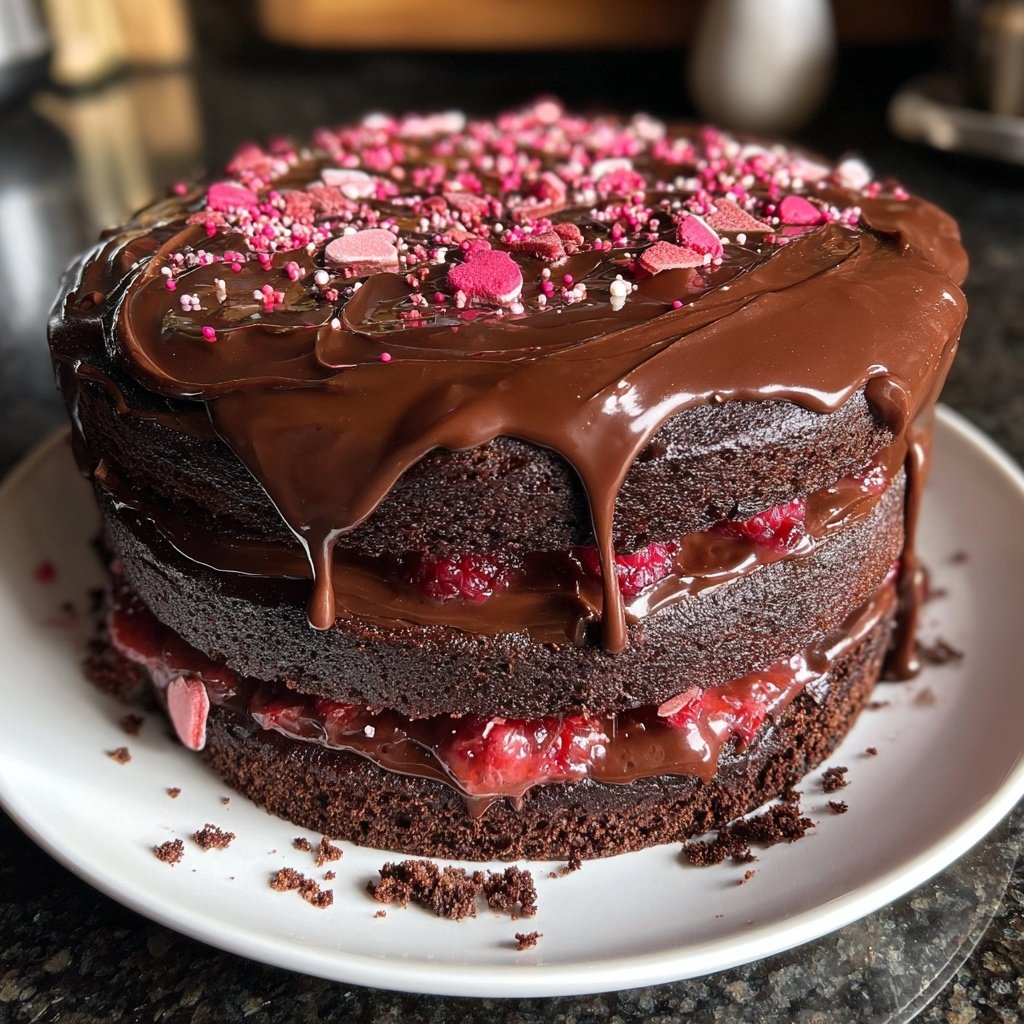
I always look forward to Galentine's Day, and this Fun Chocolate Layer Cake is my favorite way to celebrate with friends. With its rich chocolate layers, surprise fillings, and vibrant colors, it's a delightful centerpiece for any gathering. I love how this cake brings sweetness to our friendship and makes every bite a moment to savor. Baking this cake is also a fun activity to do together, allowing us to bond over mixing, decorating, and of course, tasting the delicious results!
When I first made this Galentine's Fun Chocolate Layer Cake, I wanted something special that reflected our fun-loving friendship. I used my favorite layered cake method, where each layer is packed with flavor and moisture, making it melt-in-your-mouth good. Adding a splash of espresso to the chocolate batter truly enhances the richness, too!
Also, don't forget to let the cakes cool completely before frosting them; this ensures that your frosting stays beautifully intact rather than melting off. Trust me, the extra time is worth it for a cake that looks as good as it tastes!
Why You'll Love This Recipe
- Rich chocolate flavor paired with a hint of espresso
- Fun colorful layers that brighten up any celebration
- Perfect for sharing with friends on Galentine's Day
The Role of Espresso in Chocolate Cake
In this Fun Chocolate Layer Cake, espresso powder plays a crucial role beyond just adding coffee flavor. It enhances the chocolate, deepening its richness and complexity without making the cake taste like coffee. Many bakers skip espresso, but I find that even a tablespoon can elevate the flavor profile significantly. If you don't have espresso powder, you can substitute it with instant coffee granules. Just make sure to dissolve them in the boiling water before mixing them into the batter to ensure even flavor distribution.
Another key aspect to remember is that the espresso shouldn't overpower the chocolate. It should subtly deepen the overall flavor, making each bite more indulgent. If you're serving this cake to friends who might prefer a milder taste, you might opt to reduce the espresso powder to 2 teaspoons. However, be cautious not to omit it entirely, as its absence diminishes the cake's flavor depth.
Texture Tips for Cake Perfection
Achieving the perfect texture in your chocolate cake requires attention to detail. The use of boiling water in the batter might seem unusual, but this technique actually helps to bloom the cocoa powder, creating a more luscious and moist crumb. When adding boiling water, don't worry if the batter looks thin; this ensures that your cake turns out incredibly moist. Just be sure to handle it gently to not overmix, which can develop gluten and lead to a denser texture.
Cooling the cakes properly after baking is equally essential. Allow them to cool in the pans for about 10 minutes. This resting time helps maintain moisture and prevents the layers from sticking. Once turned out onto wire racks, let them cool completely before frosting. Frosting a warm cake can cause the frosting to melt and slide off, resulting in a less attractive finish.
Smart Decorating Ideas
When it comes to decorating your cake, colorful sprinkles and chocolate shavings can add a whimsical touch, especially for a joyful celebration like Galentine's Day. If you want a more polished look, consider using a cake comb to create textured sides. This not only enhances visual appeal but also gives guests something to admire before they even take a bite. To achieve a layered effect with sprinkles, tilt the cake slightly and apply the sprinkles towards the base where they can catch and adhere more easily.
For anyone interested in variations, consider adding a layer of raspberry or strawberry jam between the chocolate layers for a fruity surprise. The tartness complements the rich chocolate beautifully, adding an extra dimension. Alternatively, for a more adult twist, you could drizzle some salted caramel over the top before adding sprinkles, providing a balance of sweet and savory.
Ingredients
For the Cake
- 1 ¾ cups all-purpose flour
- 1 ¾ cups granulated sugar
- ¾ cup unsweetened cocoa powder
- 1 ½ teaspoons baking powder
- 1 ½ teaspoons baking soda
- 1 teaspoon salt
- 2 large eggs
- 1 cup whole milk
- ½ cup vegetable oil
- 2 teaspoons vanilla extract
- 1 cup boiling water
- 1 tablespoon espresso powder
For the Frosting
- 1 cup unsalted butter, softened
- 3 ½ cups powdered sugar
- ½ cup cocoa powder
- ¼ teaspoon salt
- 1 teaspoon vanilla extract
- 3-4 tablespoons heavy cream
For Decoration
- Colorful sprinkles
- Chocolate shavings
Instructions
How to Make Your Cake
Preheat the Oven
Preheat your oven to 350°F (175°C). Grease and flour two 9-inch round cake pans.
Mix Dry Ingredients
In a large bowl, whisk together the flour, sugar, cocoa powder, baking powder, baking soda, and salt.
Combine Wet Ingredients
Add eggs, milk, oil, and vanilla extract to the dry ingredients. Beat on medium speed for 2 minutes until well combined.
Add Boiling Water
Stir in the boiling water and espresso powder. The batter will be thin; this is normal.
Bake
Pour the batter evenly into the prepared pans and bake for 30-35 minutes until a toothpick inserted in the center comes out clean.
Cool and Frost
Let the cakes cool in the pans for 10 minutes, then turn them out onto wire racks to cool completely. Frost with the chocolate frosting once cooled.
Decorate
Decorate the cake with colorful sprinkles and chocolate shavings as desired.
Enjoy Your Cake!
Pro Tips
- For a more intense chocolate flavor, use high-quality cocoa powder and consider adding a layer of raspberry or cherry jam between the cake layers before frosting.
Make-Ahead Tips
This Fun Chocolate Layer Cake can be made ahead of time, making it an ideal choice for busy Galentine's Day celebrations. You can bake the cake layers a day in advance, allowing them to cool completely before wrapping them in plastic wrap to preserve their moisture. Store them at room temperature if you plan to frost and serve the next day, or refrigerate if you're making it even further in advance.
When you're ready to frost, simply let the layers come to room temperature. If you're short on time, you can also prepare the frosting ahead and store it in the refrigerator in an airtight container. Just give it a quick remix with an electric mixer to restore its smooth and spreadable consistency before applying it to the cake.
Storage and Freezing
If there's any leftover cake (which is rare for this crowd-pleaser!), you can store it in an airtight container at room temperature for up to three days. However, for extended freshness, this cake freezes well. Wrap individual cake slices tightly in plastic wrap and then foil, or use a freezer-safe container. It can be stored in the freezer for up to three months while maintaining its flavor and moisture.
When you're ready to enjoy the frozen cake, simply remove it from the freezer and let it thaw in the refrigerator for a few hours or at room temperature for about 30 minutes. This approach keeps the cake moist and ensures that it tastes as good as fresh!
Questions About Recipes
→ Can I make this cake ahead of time?
Yes, you can bake the cakes a day in advance. Just wrap them well and store them in the refrigerator.
→ What can I use instead of eggs?
You can substitute each egg with 1/4 cup applesauce or a flaxseed egg (1 tablespoon flaxseed meal mixed with 2.5 tablespoons water).
→ How do I store the cake?
Store the cake in an airtight container at room temperature for up to 3 days or in the refrigerator for up to a week.
→ Can I freeze the cake?
Yes, you can freeze the un-frosted cake layers for up to 2 months. Just wrap them tightly in plastic wrap before freezing.
Galentine's Fun Chocolate Layer Cake
Created by: The Tinastastyrecipes Team
Recipe Type: Home-Style Dessert Bakes
Skill Level: Intermediate
Final Quantity: 8 servings
What You'll Need
For the Cake
- 1 ¾ cups all-purpose flour
- 1 ¾ cups granulated sugar
- ¾ cup unsweetened cocoa powder
- 1 ½ teaspoons baking powder
- 1 ½ teaspoons baking soda
- 1 teaspoon salt
- 2 large eggs
- 1 cup whole milk
- ½ cup vegetable oil
- 2 teaspoons vanilla extract
- 1 cup boiling water
- 1 tablespoon espresso powder
For the Frosting
- 1 cup unsalted butter, softened
- 3 ½ cups powdered sugar
- ½ cup cocoa powder
- ¼ teaspoon salt
- 1 teaspoon vanilla extract
- 3-4 tablespoons heavy cream
For Decoration
- Colorful sprinkles
- Chocolate shavings
How-To Steps
Preheat your oven to 350°F (175°C). Grease and flour two 9-inch round cake pans.
In a large bowl, whisk together the flour, sugar, cocoa powder, baking powder, baking soda, and salt.
Add eggs, milk, oil, and vanilla extract to the dry ingredients. Beat on medium speed for 2 minutes until well combined.
Stir in the boiling water and espresso powder. The batter will be thin; this is normal.
Pour the batter evenly into the prepared pans and bake for 30-35 minutes until a toothpick inserted in the center comes out clean.
Let the cakes cool in the pans for 10 minutes, then turn them out onto wire racks to cool completely. Frost with the chocolate frosting once cooled.
Decorate the cake with colorful sprinkles and chocolate shavings as desired.
Extra Tips
- For a more intense chocolate flavor, use high-quality cocoa powder and consider adding a layer of raspberry or cherry jam between the cake layers before frosting.
Nutritional Breakdown (Per Serving)
- Calories: 400 kcal
- Total Fat: 24g
- Saturated Fat: 15g
- Cholesterol: 60mg
- Sodium: 190mg
- Total Carbohydrates: 50g
- Dietary Fiber: 3g
- Sugars: 35g
- Protein: 5g