Homemade Reese's Cake Pops
Highlighted under: Home-Style Dessert Bakes
I absolutely adore making Homemade Reese's Cake Pops because they capture the classic flavor of peanut butter and chocolate in a fun, bite-sized treat. There's something magical about combining moist chocolate cake with creamy peanut butter and dipping them in a rich chocolate coating. Over the years, I've perfected the method to ensure they stay moist and flavorful. Trust me, once you try these, you'll want to make them for every occasion, from birthday parties to cozy family gatherings!
When I first attempted to make Homemade Reese's Cake Pops, I experimented with different cake recipes until I landed on a moist chocolate cake that perfectly complements the peanut butter flavor. The key was ensuring that the cake didn't dry out during the process. To elevate the taste, I added a pinch of salt to the peanut butter filling, which really balanced the sweetness and enhanced the overall flavor.
One of my favorite tips is to let the chocolate coating set at room temperature instead of refrigerating them, which gives the pops a nice, smooth finish. Each bite is a delightful balance of textures and flavors that brings back childhood memories while making it a treat for everyone to enjoy!
Why You'll Love This Recipe
- Irresistible combination of chocolate and peanut butter
- Fun to make and decorate for any occasion
- Perfect for sharing or as a quick snack
Mastering the Cake Base
When making the cake base for these pops, the balance of dry and wet ingredients is crucial. The combination of all-purpose flour and cocoa powder creates a rich chocolate flavor, while the inclusion of boiling water at the end ensures a silky batter that bakes evenly. Be sure to mix just until incorporated—over-mixing can lead to a dense texture. The final cake should be moist and spring back slightly when pressed.
Cooling the cake completely is a vital step before crumbling it for the filling. If the cake is still warm, it can become too gummy and difficult to work with. Once cooled, crumbling the cake into fine pieces provides a better blend with the peanut butter filling; larger chunks can result in uneven cake pops. Use your fingers or a fork to achieve even crumbles.
Perfecting the Peanut Butter Filling
The filling is where the magic of flavor comes into play. Creamy peanut butter is the star, but the choice of brand can impact the overall taste. Natural brands with no added sugar or oils can give a more authentic taste, though they may require slightly more powdered sugar to achieve the right consistency. Mixing in the milk helps create a smooth blend that binds effortlessly with the crumbled cake.
Adjusting sugar levels based on your peanut butter's taste is a great tip. If you prefer a slightly less sweet filling, you can reduce the powdered sugar by a few tablespoons. Alternatively, you can swap in almond butter for a nutty twist, though this will alter the flavor profile of your pops.
Coating and Decorating Tips
When melting the chocolate chips for coating, be mindful of the microwave timing. Start with 30-second bursts, stirring in between to prevent overheating. Chocolate should be melted until it's glossy and fully melted without any grit; if it becomes too thick, try adding the optional vegetable oil for a smoother consistency. This helps the chocolate coat the pops evenly and gives a nice sheen.
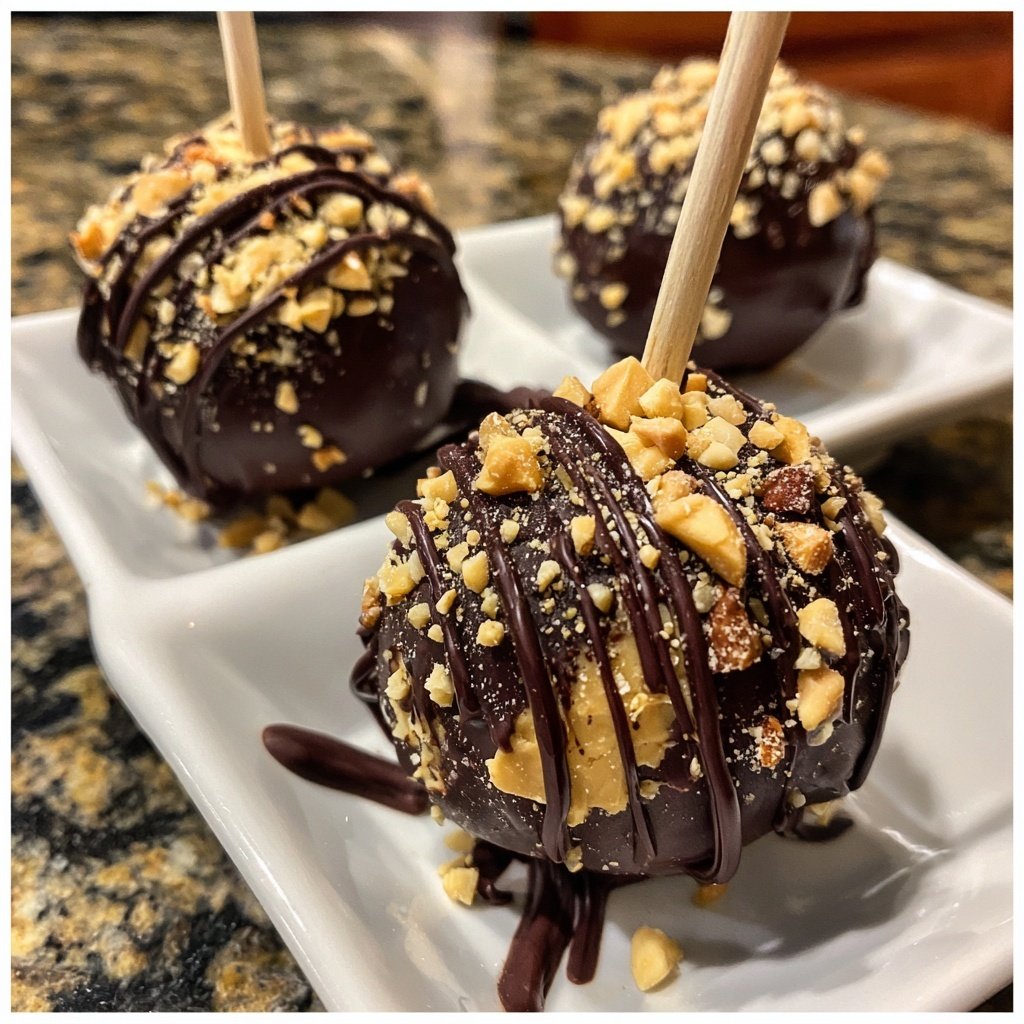
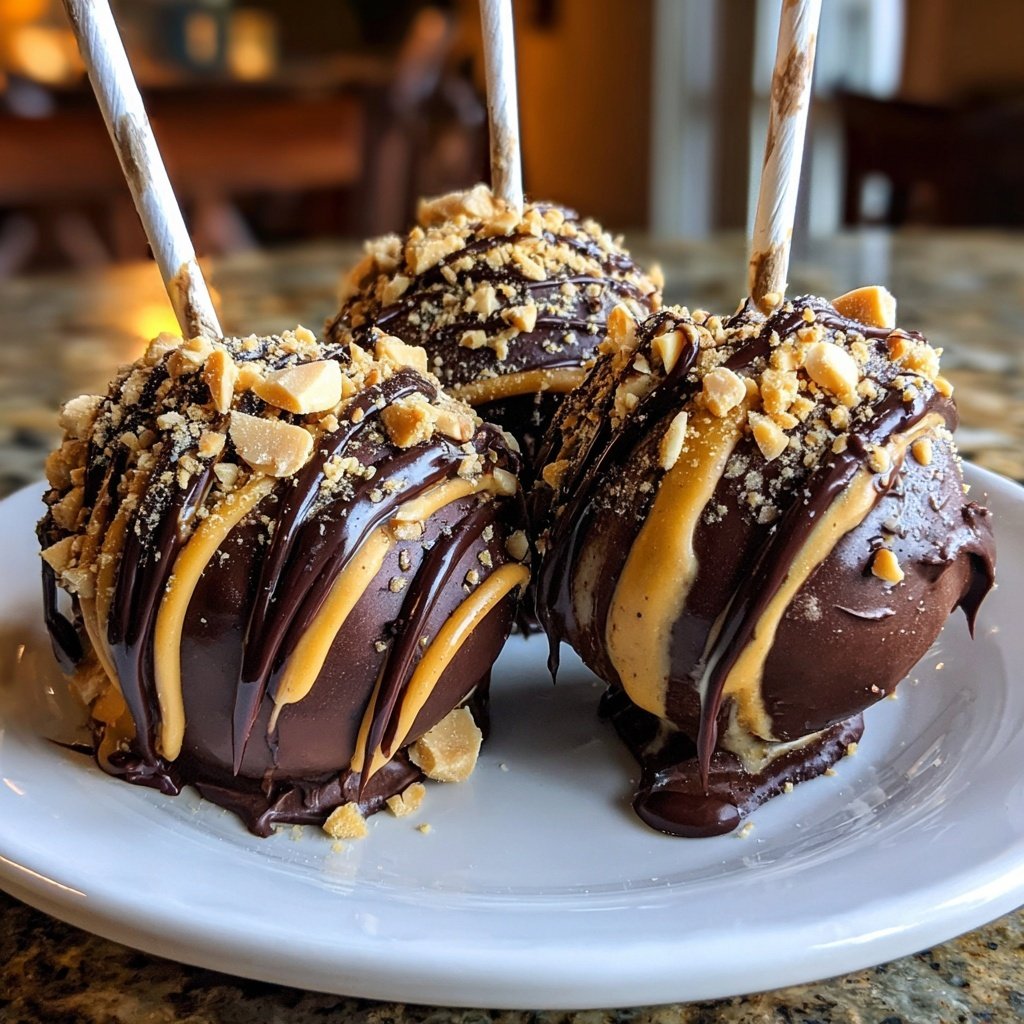
Decorating your cake pops can enhance their appearance significantly. While the chocolate is still wet, use a variety of toppings like colored sprinkles or crushed peanuts for texture and color. If you want to keep things interesting, consider using white chocolate or colored candy melts for a vibrant twist. Allow the decorated pops to set completely at room temperature, which usually takes about 15 minutes.
Ingredients
Cake
- 1 cup all-purpose flour
- 1/2 cup unsweetened cocoa powder
- 1 cup granulated sugar
- 1/2 teaspoon baking powder
- 1/2 teaspoon baking soda
- 1/4 teaspoon salt
- 1 large egg
- 1/2 cup milk
- 1/4 cup vegetable oil
- 1 teaspoon vanilla extract
- 1/2 cup boiling water
Filling
- 1/2 cup creamy peanut butter
- 1 cup powdered sugar
- 1 tablespoon milk
Coating
- 8 oz chocolate chips (milk or dark)
- 1 tablespoon vegetable oil (optional)
Decoration (optional)
- Sprinkles
- Crushed peanuts
Instructions
Bake the Cake
Preheat your oven to 350°F (175°C). In a bowl, mix together the flour, cocoa powder, sugar, baking powder, baking soda, and salt. In another bowl, whisk together the egg, milk, vegetable oil, and vanilla extract. Combine wet and dry ingredients, adding boiling water until smooth. Pour into a greased cake pan and bake for 20 minutes or until a toothpick comes out clean. Let it cool completely.
Make the Filling
In a bowl, mix together peanut butter, powdered sugar, and milk until smooth. Once the cake cools, crumble it into a large bowl and add the peanut butter mixture until fully incorporated.
Form Cake Pops
Using your hands, form the mixture into small balls (about 1 inch in diameter). Place them on a baking sheet and refrigerate for about 20 minutes to firm up.
Coat the Cake Pops
Melt the chocolate chips with vegetable oil in a microwave, stirring until smooth. Dip each cake ball on a lollipop stick into the chocolate, letting any excess drip off. Place them back on the baking sheet.
Decorate and Set
If using, sprinkle crushed peanuts or sprinkles on top while the chocolate is still wet. Allow the chocolate to set at room temperature for about 15 minutes before serving.
Pro Tips
- For a rich flavor, try using dark chocolate for coating. Also, consider using different flavored nut butters for a fun twist on the classic recipe!
Storage and Shelf Life
Once your homemade Reese's cake pops have fully set, they can be stored in an airtight container at room temperature for up to three days. If you prefer them to last longer, consider refrigerating them; they'll keep fresh for about a week. Just remember that refrigeration can sometimes alter the texture of the chocolate coating, making it slightly less crisp.
If you want to freeze your cake pops for extended enjoyment, place them in a freezer-safe container separated by parchment paper. They can last up to three months in the freezer. When ready to enjoy, let them come to room temperature before serving. This prevents cracking of the chocolate shell and maintains their deliciousness.
Troubleshooting Common Issues
If your cake pops are falling off the stick, it could be due to either the filling being too moist or the chocolate coating not being thick enough. Ensure that the cake is crumbled finely, and the peanut butter mixture is adequately mixed to the right consistency. You can always chill the cake balls a bit longer if they feel too soft before dipping them in chocolate.
Another common issue is the chocolate coating cracking after it sets. This often occurs if the chocolate has overheated or if the pops were dipped when too warm. To prevent this, make sure the cake pops are chilled properly before dipping, and melt the chocolate gently to maintain its smoothness. Avoiding drastic temperature changes can also help maintain the integrity of the chocolate coating.
Questions About Recipes
→ Can I use a cake mix instead?
Yes, you can use any chocolate cake mix and follow the instructions on the box for a quicker option.
→ How long do these cake pops last?
They can be kept in an airtight container for up to a week at room temperature or up to two weeks in the refrigerator.
→ Can I freeze the cake pops?
Absolutely! Just wrap them individually in plastic wrap and place them in a freezer-safe bag. They can last for up to a month.
→ What can I use instead of peanut butter?
You can substitute almond butter, sunbutter, or any other nut butter to accommodate dietary preferences or allergies.
Homemade Reese's Cake Pops
Created by: The Tinastastyrecipes Team
Recipe Type: Home-Style Dessert Bakes
Skill Level: Easy
Final Quantity: 12
What You'll Need
Cake
- 1 cup all-purpose flour
- 1/2 cup unsweetened cocoa powder
- 1 cup granulated sugar
- 1/2 teaspoon baking powder
- 1/2 teaspoon baking soda
- 1/4 teaspoon salt
- 1 large egg
- 1/2 cup milk
- 1/4 cup vegetable oil
- 1 teaspoon vanilla extract
- 1/2 cup boiling water
Filling
- 1/2 cup creamy peanut butter
- 1 cup powdered sugar
- 1 tablespoon milk
Coating
- 8 oz chocolate chips (milk or dark)
- 1 tablespoon vegetable oil (optional)
Decoration (optional)
- Sprinkles
- Crushed peanuts
How-To Steps
Preheat your oven to 350°F (175°C). In a bowl, mix together the flour, cocoa powder, sugar, baking powder, baking soda, and salt. In another bowl, whisk together the egg, milk, vegetable oil, and vanilla extract. Combine wet and dry ingredients, adding boiling water until smooth. Pour into a greased cake pan and bake for 20 minutes or until a toothpick comes out clean. Let it cool completely.
In a bowl, mix together peanut butter, powdered sugar, and milk until smooth. Once the cake cools, crumble it into a large bowl and add the peanut butter mixture until fully incorporated.
Using your hands, form the mixture into small balls (about 1 inch in diameter). Place them on a baking sheet and refrigerate for about 20 minutes to firm up.
Melt the chocolate chips with vegetable oil in a microwave, stirring until smooth. Dip each cake ball on a lollipop stick into the chocolate, letting any excess drip off. Place them back on the baking sheet.
If using, sprinkle crushed peanuts or sprinkles on top while the chocolate is still wet. Allow the chocolate to set at room temperature for about 15 minutes before serving.
Extra Tips
- For a rich flavor, try using dark chocolate for coating. Also, consider using different flavored nut butters for a fun twist on the classic recipe!
Nutritional Breakdown (Per Serving)
- Calories: 350 kcal
- Total Fat: 21g
- Saturated Fat: 10g
- Cholesterol: 30mg
- Sodium: 90mg
- Total Carbohydrates: 42g
- Dietary Fiber: 2g
- Sugars: 28g
- Protein: 5g